IMPORTANT NOTE

Hello, and welcome.
I would like to inform you that I AM MOVING.
...well, sort of. I have started a new blog, Oui Crochet, that focuses just on crochet, crochet patterns, and crochet resources. I am in the process of building it up as a one stop shop for all things crochet, and I am very excited about it. I hope you will come over and check out my progress. :)
I will be moving my patterns from this site, to my new site. My idea is to leave this site active, so that you can still access other aspects of this site. I will also leave a modified "introduction" post where each pattern is on this site, as to keep all links active and make it so that you can easily locate the pattern's new home. As an added bonus, you will also find new printable/downloadable versions of my patterns.
I apologize for any inconvenience, but I assure you, this change is a positive one. I look forward to seeing you at Oui Crochet.
Happy Crocheting!


Wednesday, February 29, 2012

Free Crochet Patterns & Thanks!

So, I decided to peek at my stats today, as I do from time to time. I was absolutely stunned when I saw that I had so many page views of my Crochet Leg Warmers pattern!

It turns out that my pattern was added to a super-awesome site that is full of free crochet pattern links, and that is the source of my many, many page views.

I want to thank Crochet Pattern Central for including my link! I have used that site for the past 4 years whenever I want links to patterns, but I'd never thought one of my patterns would show up there. I am truly flattered!
If you are a crocheter, go check them out! They have thousands of links to so many different kinds of projects.

Thanks again, Crochet Pattern Central!

Photobucket

Crochet Clover Headband (free pattern)

   Remember when you were a kid, and St. Patrick's Day was nearing, and you were  obsessed with making sure you (and everyone else in your family) had something... ANYTHING... green to wear?
Yeah, that.

   I thought it would be fun to make little clover headbands for my youngest girls. I was going to do it the easy way, and look up a pattern online. Unfortunately, all forms of internet access in my house was occupied at the time. I ended up having to wing it. The headband part would be easy enough. But the clover... I wanted something easy. Something that could be made all in one piece. I also thought it would be a good idea to write it down as I worked on it. After a little time, and a bunch of crossed out ideas on my papers, I came up with this quick and simple headband.

Click below for the pattern!
Crochet  Clover Headband 


Photobucket

Tuesday, February 28, 2012

A Bunch Of Thanks! Next Party Theme! & Award!

   Hi! First off, I would like to thank everyone for coming to my Blog Party- Pinterest Style!
I think it was a great success for my first party! I hope you all had as much fun as I did!

   I am already planning for my next party. I kind of just came up with the idea for the first one, and jumped in both feet first, so this time, I will do a little more planning.
I was thinking of a themed party! I was also thinking that I will run it for an entire week, since some people are online more during the week, while others are online more during the weekends.

   As for the next theme... in honor of St. Patrick's day, we will be celebrating: GREEN!


Search your site for green and pin it between March 12-19, 2012. Be creative and join in the fun! I look forward to seeing you all there!

Check out my new BLOG PARTY page for more info on how my blog parties work.


My next order of business...

   I am very proud to accept  the Liebster Blog Award from Sarah at Homestyle Cooking Around The World!!!

A Liebster Blog Award is given to talented and loved bloggers who have less than 200 followers.


There are a few rules that go with accepting the award:
-Thank your Liebster Blog Award presenter on your blog. 
-Link back to the blogger who presented the award to you. 
-Copy and paste the blog award on your blog. 
-Present the Liebster Blog Award to 5 blogs of 200 followers or less who you feel deserve to be noticed. 
-Let them know they have been chosen by leaving a comment at their blog.

   Thank you so much, Sarah! For those of you who have never visited Sarah's Blog, I encourage you to do so! She has a ton of yummy recipes and beautiful pictures to match. I can seriously spend hours there just looking at everything and deciding what I want to make first! Just take a peek at these Chunky Pecan Pie Bars and these Chinese Pot Stickers/Dumplings, and you will see what I mean!

   Now it's my turn to "pay it forward".
I have chosen five of my favorite blogs with less than 200 followers. These are great blogs by some very creative, artistic, and talented bloggers. I hope you will take a few minutes to check out their awesome blogs!

Here they are, in no particular order:

  1. The Hidden Pantry
  2. Scrapping With Pirkie
  3. Little Shack On The Hill
  4. Little Becky Homecky
  5. Random Tips On Healthy Eating

Photobucket

Monday, February 27, 2012

"All Better Soup"

Well, last night was a rough one.
While the rest of the family (myself included) have been fighting a nasty cold, I was pleasantly surprised that our 16 month old hadn't caught it.
Then last night happened.
Poor baby was up crying half of the night. Once she wore herself out (and after a few drinks of water, a dose of infant Motrin, numerous nose wipes, and some Vicks baby rub) she insisted that the only way she would sleep was if I was holding her. So, yeah... not much sleep...

When we're sick  I like to make "All Better Soup". We call it "All Better Soup" because it has chicken broth, garlic, and chile powder... you know...  stuff that makes you feel better when you're sick.
One of the best things about it is that it's quick and easy to make. Let's face it... as much as I love to cook, that's the last thing I want to do when I'm sick.
It's yummy, too! Even my 16 month old likes it. In fact, she is eating it right now.
Here's how you make it:

Quick Garlic-y Egg Drop Soup (AKA- "All Better Soup")

What You Need:


1 TB butter
2 cloves garlic, minced
4 cups chicken broth OR 4 cups water and 1 1/2 TB chicken bouillon granules
1 tsp chile powder of your choice. (I used 1/2 tsp each pasilla chile and New Mwxico chile powders)
2 eggs, beaten.

What You Do:

  1. First gather all of the ingredients... this soup makes up fast!
  2. On medium heat, melt the butter in a large saucepan or a pot big enough to hold 4+ cups water.
  3. Add the garlic and cook and stir about a minute. Don't let it brown.
  4. Add the chicken broth or water and bouillon granules AND the chile powder.
  5. Stir and bring to a boil.
  6. Reduce heat to a simmer, and slowly add beaten eggs, while stirring. Cook another minute or two, until the eggs are fully cooked.
  7. Serve warm.
That's it.
Sorry I don't have a picture! If I get one soon, I'll edit it in.


Photobucket

Friday, February 24, 2012

You are Invited to My Blog Party- Pinterest Style!

My name is Susie, and I am a Pinterest addict.
Instead of trying to fix it, I decided to embrace it.
How better to embrace something, than to have a party? Am I right?

Here's how it works:
  1. Make sure you are following me on Pinterest, so I can add you to the board. (Leave a link to your pinterest profile in comments when you follow, so that I can follow you and  add you. I will add you as soon as I can! Once you are added, you are automatically added for participation in future parties... this means, it will get easier for all of us! lol)
  2. Choose up to five "pinworthy" projects, recipes, ideas... you get the picture... from your own blog or website.
  3. Pin them on my Blog Party board.
  4. Check out the other awesome pins there. Repin pins you like (to your own boards), follow blogs that interest you, and have fun!
Easy right? Just click the link to get to my party board!


Since this is my first "party", and not many people are signed up yet, I may extend it past the 26th. (I'm still working the bugs out). (And hoping it works! lol)

Photobucket

Wednesday, February 22, 2012

Crochet Leg Warmers (Child sized)

While strolling the aisles at Walmart last weekend, I decided to look at the yarn.
Why is it that when I am there in the yarn department, I forget what it is that I wanted to make?
I knew I wanted to get some yarn.
I knew I had projects on my list of things to make. I just couldn't remember what they were!
How can I get yarn for a project when I don't know what the project is???
You see my dilemma?
My solution was to let my seven year old daughter choose a skein of yarn, and I would figure out something to make later.
She chose "Honeydew" in Red Heart Super Saver Yarn.
Since she chose it, I figured it only fitting that I make something for her. I decided to make leg warmers. The problem was, I didn't have a pattern and one of the kids was using the computer at the time.
Time for another solution: I'll write my own pattern.
Here is what I came up with.


Click the link below for the pattern:


Photobucket

Tuesday, February 21, 2012

1-2-3 Cake found on Pinterest!

When I saw this quick cake idea on Pinterest, I repinned it and immediately made plans to try it.


Then, I went to The Hidden Pantry and followed that blog, because she has a ton of awesome looking recipes (even one for home cured bacon!!!) So check it out!

Now back to the cake.

I used Betty Crocker Angel Food Cake Mix and Betty Crocker Super Moist Chocolate Fudge Cake Mix.

The result was a spongy, light and airy, little cake... like a chocolate Angel Food cake.
I used coffee cups. My coffee cups are really thin, so I only needed 45 seconds. 


I also decided to drop a few chocolate chips into the batter. They sunk to the bottom of the cup, but when inverted into a bowl, they made a nice little "frosting".


While this isn't your typical thick, rich cake, there are a lot of things that I really like about it.
  • Each serving is only about 126 calories (before adding chocolate chips). Yes. I calculated it out. And in case you are wondering, there are about 26 servings... which brings me to my next point...
  • It is economical. I bought both cake mixes for a total of about $3. That's around 11 cents per serving.
  • My kids like it! They also like that they can make it themselves. I like that, too!
  • There are so many flavor possibilities! I don't even know what I want to try next. Carrot cake? Lemon? Strawberry?
  • It stores well, and is nice to have on hand when we want a little treat.
  • It is so quick! Simply measure it out, add water, and nuke. Cake in one minute!

Thank you to The Hidden Pantry for sharing this recipe!


Monday, February 20, 2012

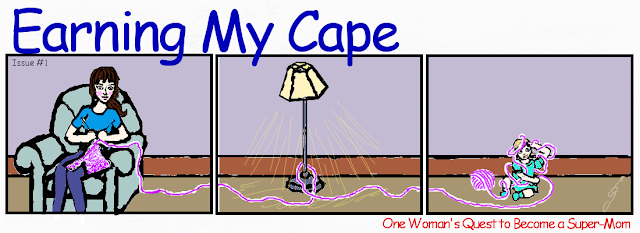
Banner: Issues #1 & #2

I thought I'd put up a new little post each time my banner comic changes.
I figure it's a good way to archive the old comics, and I can link back to them from my My Banner page.


Here's Issue #1:


And here is Issue #2:

If you haven't checked it out yet, I encourage you to take a peek at my daughter's blog to check out some of her other artwork and writings.

Saturday, February 18, 2012

Fried Mac-n-Cheese... (yes I DID just say fried)

Disclaimer: If you are dieting, and you love cheese and bacon, please do not torture yourself by reading this post. If you go against this caution and read it anyway, don't say I didn't warn you!


My family loves macaroni and cheese.
Half of my kids are Kraft purists. Give them the stuff out of the blue box and don't do anything  different to it, and no one gets hurt.
OK. Fine.
More of the "good stuff" for the rest of us!

What is this "good stuff" I speak of? Well, it looks something like this:


Want a better look? Here ya go:


Looks yummy, hu? It is!
It's easy, too.

What you need:
2 boxes of macaroni and cheese (I use Kraft... my kids revolt if we even consider buying anything else. Any variety will work. I usually just use the Original. This time, my husband picked up the Thick and Creamy variety, so that's what you see.)

bacon (Use any kind you like. Also, use as much or as little as you like. I used about 4 slices. I probably would have gone with 6, since we love bacon, but everyone wanted some on their cheeseburgers... so yeah...)


Cheese (As much or as little as you like- I usually use around 1 1/2 cups shredded. Again, choose your favorite kind. I love using a nice sharp cheddar. Tillamook makes a good one! Monterey Jack is also a favorite. This time, I had Monterey Jack on hand and I had a few slices of American left over from the burgers. Perfect!)


A NON-STICK skillet (I cannot stress non-stick enough. You don't want a burnt-on, hard to clean, stuck-on mess.)


What you do:
Make the boxes of mac n cheese according to the directions.

While the mac n cheese is cooking, get out your nonstick skillet and fry up your bacon until it is crisp. Remove the bacon and drain off the grease. Remove the grease from the pan, as well. Break up the bacon into small pieces, and set aside.

Now here's where the fun starts.

Mix the bacon pieces and half of the cheese into the macaroni and cheese.

Make sure your non-stick skillet is heated on medium heat. Take half of the reserved cheese and sprinkle it directly onto the skillet. Now, pour the macaroni and cheese over the cheese in the skillet. DO NOT STIR. Top with remaining cheese.

Once the cheese on the bottom has crisped up a bit, use a spatula to gently lift and turn sections of the mac n cheese. You should see nice golden fried cheese. Yum!
At this point, feel free to break up some of that yummy fried cheese and gently mix it in. Be sure not to disturb the bottom of the pan, though.

After a few minutes, lift the mac n cheese from the bottom, to check the doneness of the cheese, and when it is where you want it, go ahead and turn the heat off and give the whole pan a little stir. That's it.

Serve and enjoy the yumminess.

Friday, February 17, 2012

I want Potato Soup, but ... (recipe)

...I used all of my potatoes to make mashed potatoes with dinner last night!
Hey! I do have leftovers... let's see what I can come up with!

After raiding the fridge, here is what I found:


I sure wish I had celery. Oh well. If you have it, I recommend slicing some thin and adding them with the carrots & bell pepper.
Speaking of the bell pepper,  I wish mine was red instead of green, but it isn't, so green will have to do. Honestly, I don't know if I even need a bell pepper for potato soup, but I have it, so I will use it. Logical, right? So, yeah, use whatever veggies you have on hand, if you think it will taste good.

Here's what I used:
about 1 TB butter or oil or bacon fat or whatever you want to use here
1/4 cup shredded carrot
1/8 cup finely diced bell pepper
1/3 cup finely chopped onion (I used a red one, but any color will do)
1 clove of fresh, minced garlic
1/2 cup diced, cooked ham
4 TB flour
4TB fat (butter or bacon fat would be awesome. I usually use a combo of bacon fat and Smart Balance. I seriously need to go to the grocery store, so this time I just used canola oil.)
2 cups milk (plus extra if you want a thinner soup. I like a thick potato soup, myself.)
2 cups water
1 TB chicken bouillon granules (yes. I love using this stuff. please don't judge me.)
1/2 tsp salt (or to taste)
1/2 tsp pepper (or to taste)
1/2 tsp dried parsley flakes (optional)
2 cups mashed potatoes (thought I forgot about them, didn't you?)

Here's what I did:
I  heated 1 TB butter (again, you can use oil or bacon fat... mmmmm... bacon fat...) in a large saucepan on medium- medium high heat. Once it was melted, I added the carrot and bell pepper. Cook, stirring for about 2 minutes.

Now, add the onion and cook, stirring, for another minute.

Add the ham and garlic, and cook another minute or two.

Remove the ham and veggie mixture from the pan and set it aside. Turn the pan down to medium-low heat, and add the 4 TB of fat of your choice. once it is melted (if need be), add the flour. Stir this until it is well combined, and let it cook for a minute so that the flour doesn't have that "raw flour" flavor.

Here's the tricky part... well, not really. It's quite simple, actually... if you do it right.
Pour a little bit of the milk at a time into the flour/fat mixture, while whisking constantly.
You need to make sure you just use a little milk at a time AND whisk constantly (yes, I know I just said that), so that you don't get lumps. You can use a whisk or a fork (I just use a spatula.. you can do that too, but if this is your first time making a roux, I recommend a whisk) to stir in little bits of milk, until the mixture is smooth. Just keep stirring and adding milk until you have used all 2 cups of milk and your mixture is smooth.

Next, stir in the water and bouillon granules.

Now, add the salt, pepper, and dried parsley flakes.

Stir in the mashed potatoes until they are worked into the soup.

Add the ham/veggie mixture.

Let it cook for a few minutes, until the soup is heated through.

If you want a thinner soup, add a little more milk.

That's it. Quick and Easy, right?

Here's what I got:


YUM!


Wednesday, February 15, 2012

Make Your Own Flashcards and Game

I love flashcards!
I think they are great learning tools.
When we go to book stores, educational stores, even dollar stores, I like to check out their flashcard selection.

Here are just a few of our flashcard sets.
   Some of the sets cost up to $6 or $8, but I bought most of them for between $1 and $3.
I love the cheap dollar store ones. I include them in goodie bags as party favors, or buy them as stocking stuffers. Those are nice as gifts, but when I want to be really frugal, I make my own.

These are just a few of the flashcard sets that I have made.
   I like to make my own for a few different reasons.

  • It's cheap.
  • It's easy.
  • I can make exactly what I want.
  • If my 16month old decides to crumple and eat the yellow triangle, I can simply make another one.

   I like to stock up on flashcard making supplies during "back to school" time. The stores have great sales. I usually go to Walmart or Target and buy a bunch of packs of blank index cards for around twenty-five cents each. I get packs of crayons for fifteen cents each, markers for a dollar, etc. (I also make sure I pick up a ton of folders and notebooks for fifteen cents each, too! I try to buy enough to last the whole year.)

Alphabet Flashcards

   When I make alphabet flash cards, I like to include both the upper and lower-case letters on the same card when my kids are first learning letter recognition and sounds. I used to do just one on each card, but I realized that when I combined them they seem to learn both faster and easier. I like to make the consonants one color, and the vowels another color. I think it makes the vowels stand out and my kids learn their significance easier. (That's what I hope, at least!)
   Once they become familiar with the letters, I make two more sets, splitting the letters up this time. One set is upper case, and the other is lower case. This is great for matching games, and such. Alphabet "Go Fish" is really fun, so is Memory Match.
   
Shapes and Colors

   I like to combine shapes and colors. I do this for two reasons. For one, I think it is a great teaching method. The other reason... um... well... it means I don't have to make another set.
If i want to focus on color learning, I simply ask my child to name the colors. If I want to focus on shapes, they name the shape. If they are already becoming familiar with both, they can name both.

Numbers and Counting

   When I make number flashcards, I like to do something similar to the colors and shapes. I write the number, then I make as many objects to count. If you look in the picture above, you'll see that I made hearts on that set. Later, I can make a set of numbers only and a set of hearts only. The kids can play matching games with them.

Flashcard Game

   Another fun thing to do with flashcards, is to make a game! You can make any type of game board you like. I made a simple one with crayons, a black marker and a manila folder. 


You can make your own game markers, or you can use little objects such as coins, little toy dinosaurs, toy army guys, or whatever you like.
You can decorate your game board however you like, too. I made this simple, colorful board. It doubled as a color match game (similar to Candyland) when my daughter was learning colors.
Obviously, the goal of the flashcard game is to get to the finish. Players can do this by drawing a flashcard and "getting it right". They can move forward one space for every correct answer.
You can make up your own goals and rules to suit the set of cards you use. For the Shapes and Colors cards, I let the kids move forward 2 spaces if they get both the shape and color correct, and once if they only get one correct. If they get both incorrect, they don't move at all. See where I'm going with this?

   The possibilities are endless when making you own flashcards and game. Be creative.
Get the kids involved. They can have fun helping you or they can make their own. If you ever lose a piece, or lose a card, it's easy to make another one!

Saturday, February 11, 2012

Crocheted Sweater Poncho

   One day, while searching online for inspiration for a fun crochet project, I came across a set of really cute sweater poncho patterns from Emerald Moon Creations.
I wanted to make one for my youngest daughter, but I really wanted it to have long sleeves. I ended up choosing the third pattern and making a few minor changes to get this:


My alterations were fairly simple.

I used a size H hook.

I also used Caron Simply Soft yarn in Grape. (It took a little over one skein.)

Then, I worked the sleeves to make them long.
To do this, I simply reattached the yarn to the arm hole as instructed near the end of the pattern. Instead of working the rows of single crochet, I continued the pattern until I was at the desired length of the sleeves. I finished off with as row of double crochet and two rows of single crochet, to mimic the neckline. That's it.

The entire pattern is easy to follow for the intermediate crocheter, and doesn't take long to make. I finished mine up within two days. It is machine washable and it is super-cute!

Thursday, February 9, 2012

Naan

My 4 year old and 7 year old daughters love to help me in the kitchen. One night, recently, I bribed promised them that if they went to bed when told, we would bake some sort of bread together the next day. (Worked like a charm!)

I was looking through a few recipes that I had printed out and came across one that I had printed almost a year ago. Click here to see the recipe. I had put off making it because it called for grilling the bread, and I never seemed to remember it when we were grilling. After reading through it, I decided that I could make it anyway. I would just use an electric skillet instead of a grill.

After hands were washed... ok, after hands were washed a few times, since a certain 4 year old decided it would be fun to touch everything in site, on the way to the table... We were ready to start.

First, we proofed the yeast. In the recipe, it says to proof it with just warm water, but to truly proof the yeast, you need to add about a tablespoon of sugar. (Just measure out the 1/4 cup called for in the recipe, and take a tablespoon from there.)

When the yeast is proofed, it should look something like this:

Next, we mixed the rest of the ingredients. When it came to the flour, we used all-purpose. I'm sure that the bread flour called for in the recipe would have been better, but all-purpose works fine.
Very Important: The recipe calls for 4 1/2 cups. That may be too much. We started out by using 3 cups, then added a little more until we got the right consistency.


Then we mixed....                                  And mixed...                                    And mixed...


Until we got this:


Then we kneaded... a lot!


Until we got this. Pretty, isn't it?


Now to put it in a lightly oiled bowl... or just use a pot, like I did! 


Next, I covered it lightly and waited for it to rise. 


Then the kids helped me form balls of dough.


We didn't mix minced garlic into the dough. Instead, I melted the butter (as the recipe calls for) and let the garlic sit in the butter while the balls of dough were rising.

Want to know a really quick way to mince fresh garlic when your garlic press can't be found? Check this out! 

                     
Clever, eh?

Now we roll out the balls of dough...


See how they cook up in a heated skillet (I did this part)? I also brushed the garlic butter over them at this point.

Lovely little bubbles form as they are heated.

And Voila! (as my 4 year old said)


It tastes incredible! So yummy! My whole family likes it so much that I made it again two days later.
I recommend eating it as fresh as possible... but then again, that's all I can recommend, since that's when I ate it. Yes. It disappeared that fast.

Making Naan is a bit time consuming, as all yeast breads are, but it is super easy and well worth the effort! It is also a fun baking project to share with the kids. I am certain that I will make this many, many more times, and I know I will have eager little helpers!

...now if I can only remember it the next time we are grilling!

Tuesday, February 7, 2012

Neapolitan Birthday Cake

I like Pinterest.
When my daughter's 7th birthday was coming up, I was browsing Pinterest for cake ideas. She came up next to me to peek over my shoulder. This was a defining moment. I learned that she is as bad as I am when it comes to that site! She was saying to me the same things that go through my mind as I scroll through the Pinterest pics: "Ooh! Look at that!" and "WOW! Click that one!" and "I want that! ...wait, no!... THAT!" and so on.
When she saw a picture of a beautiful Neapolitan cake, that was it. Her mind was made up. That's what she wanted. And, of course, I wanted to make it for her.
Source: sweetapolita.com via Susie on Pinterest


I clicked the link and saw the deliciously beautiful, decadent homemade cake and frosting recipe. Knowing that my time was limited, I had to come up with another plan. Making everything from scratch would have been too much work for the time I had. I had to go to Plan B- boxed cake mix and canned frosting. Quicker, cheaper, easier.

LinkWithin

Related Posts Plugin for WordPress, Blogger...